DIY Stair Runner…Again
The stair runner has been a hot topic in this house since almost after we moved in. Our wood floors are slippery, especially with socks on in the winter, and that means there have been enough falls down the stairs that we decided to put in a stair runner. I first did this as part of the One Room Challenge three years ago and decided to replace what I had originally done with a new one.
You can find all about my original DIY stair runner here. I was inspired by creative shapes I had seen but likely couldn’t afford and DIY’ed something that I thought was cool. I cut a geometric shape throughout several rugs and then, with Daniel’s help, installed them on the stairs.

I absolutely loved how these turned out. However, they started falling apart after a while. The two biggest problems were that the light color started looking dirty and then, because I had cut flat weave rugs, they were becoming too unwoven for even the carpet tape I had used along the edges to hold them together.
You can see in the above video how the rug started to unravel. Another issue with this DIY was that the rugs I had chosen were too short, so I had to join together two on each set of stairs, which added another point where the rugs could come apart. Clearly, it was time to replace them.
Because we are still staying home as much as possible during this pandemic, I couldn’t go to stores to find the perfect rug. What I wanted was a bold and darker color to hide dirt, something thin enough to be easily pliable on the stairs but not too thin and not woven, and a rug long enough that I would only need to use one on each set of stairs. The rugs also had to be inexpensive enough since I knew I was going to cut them again to create some visual interest.
I landed on the SoHo Runner Rug in navy from Rugs.com. And while navy is usually dark, this blue rug is both bold and on the brighter end, which I love.
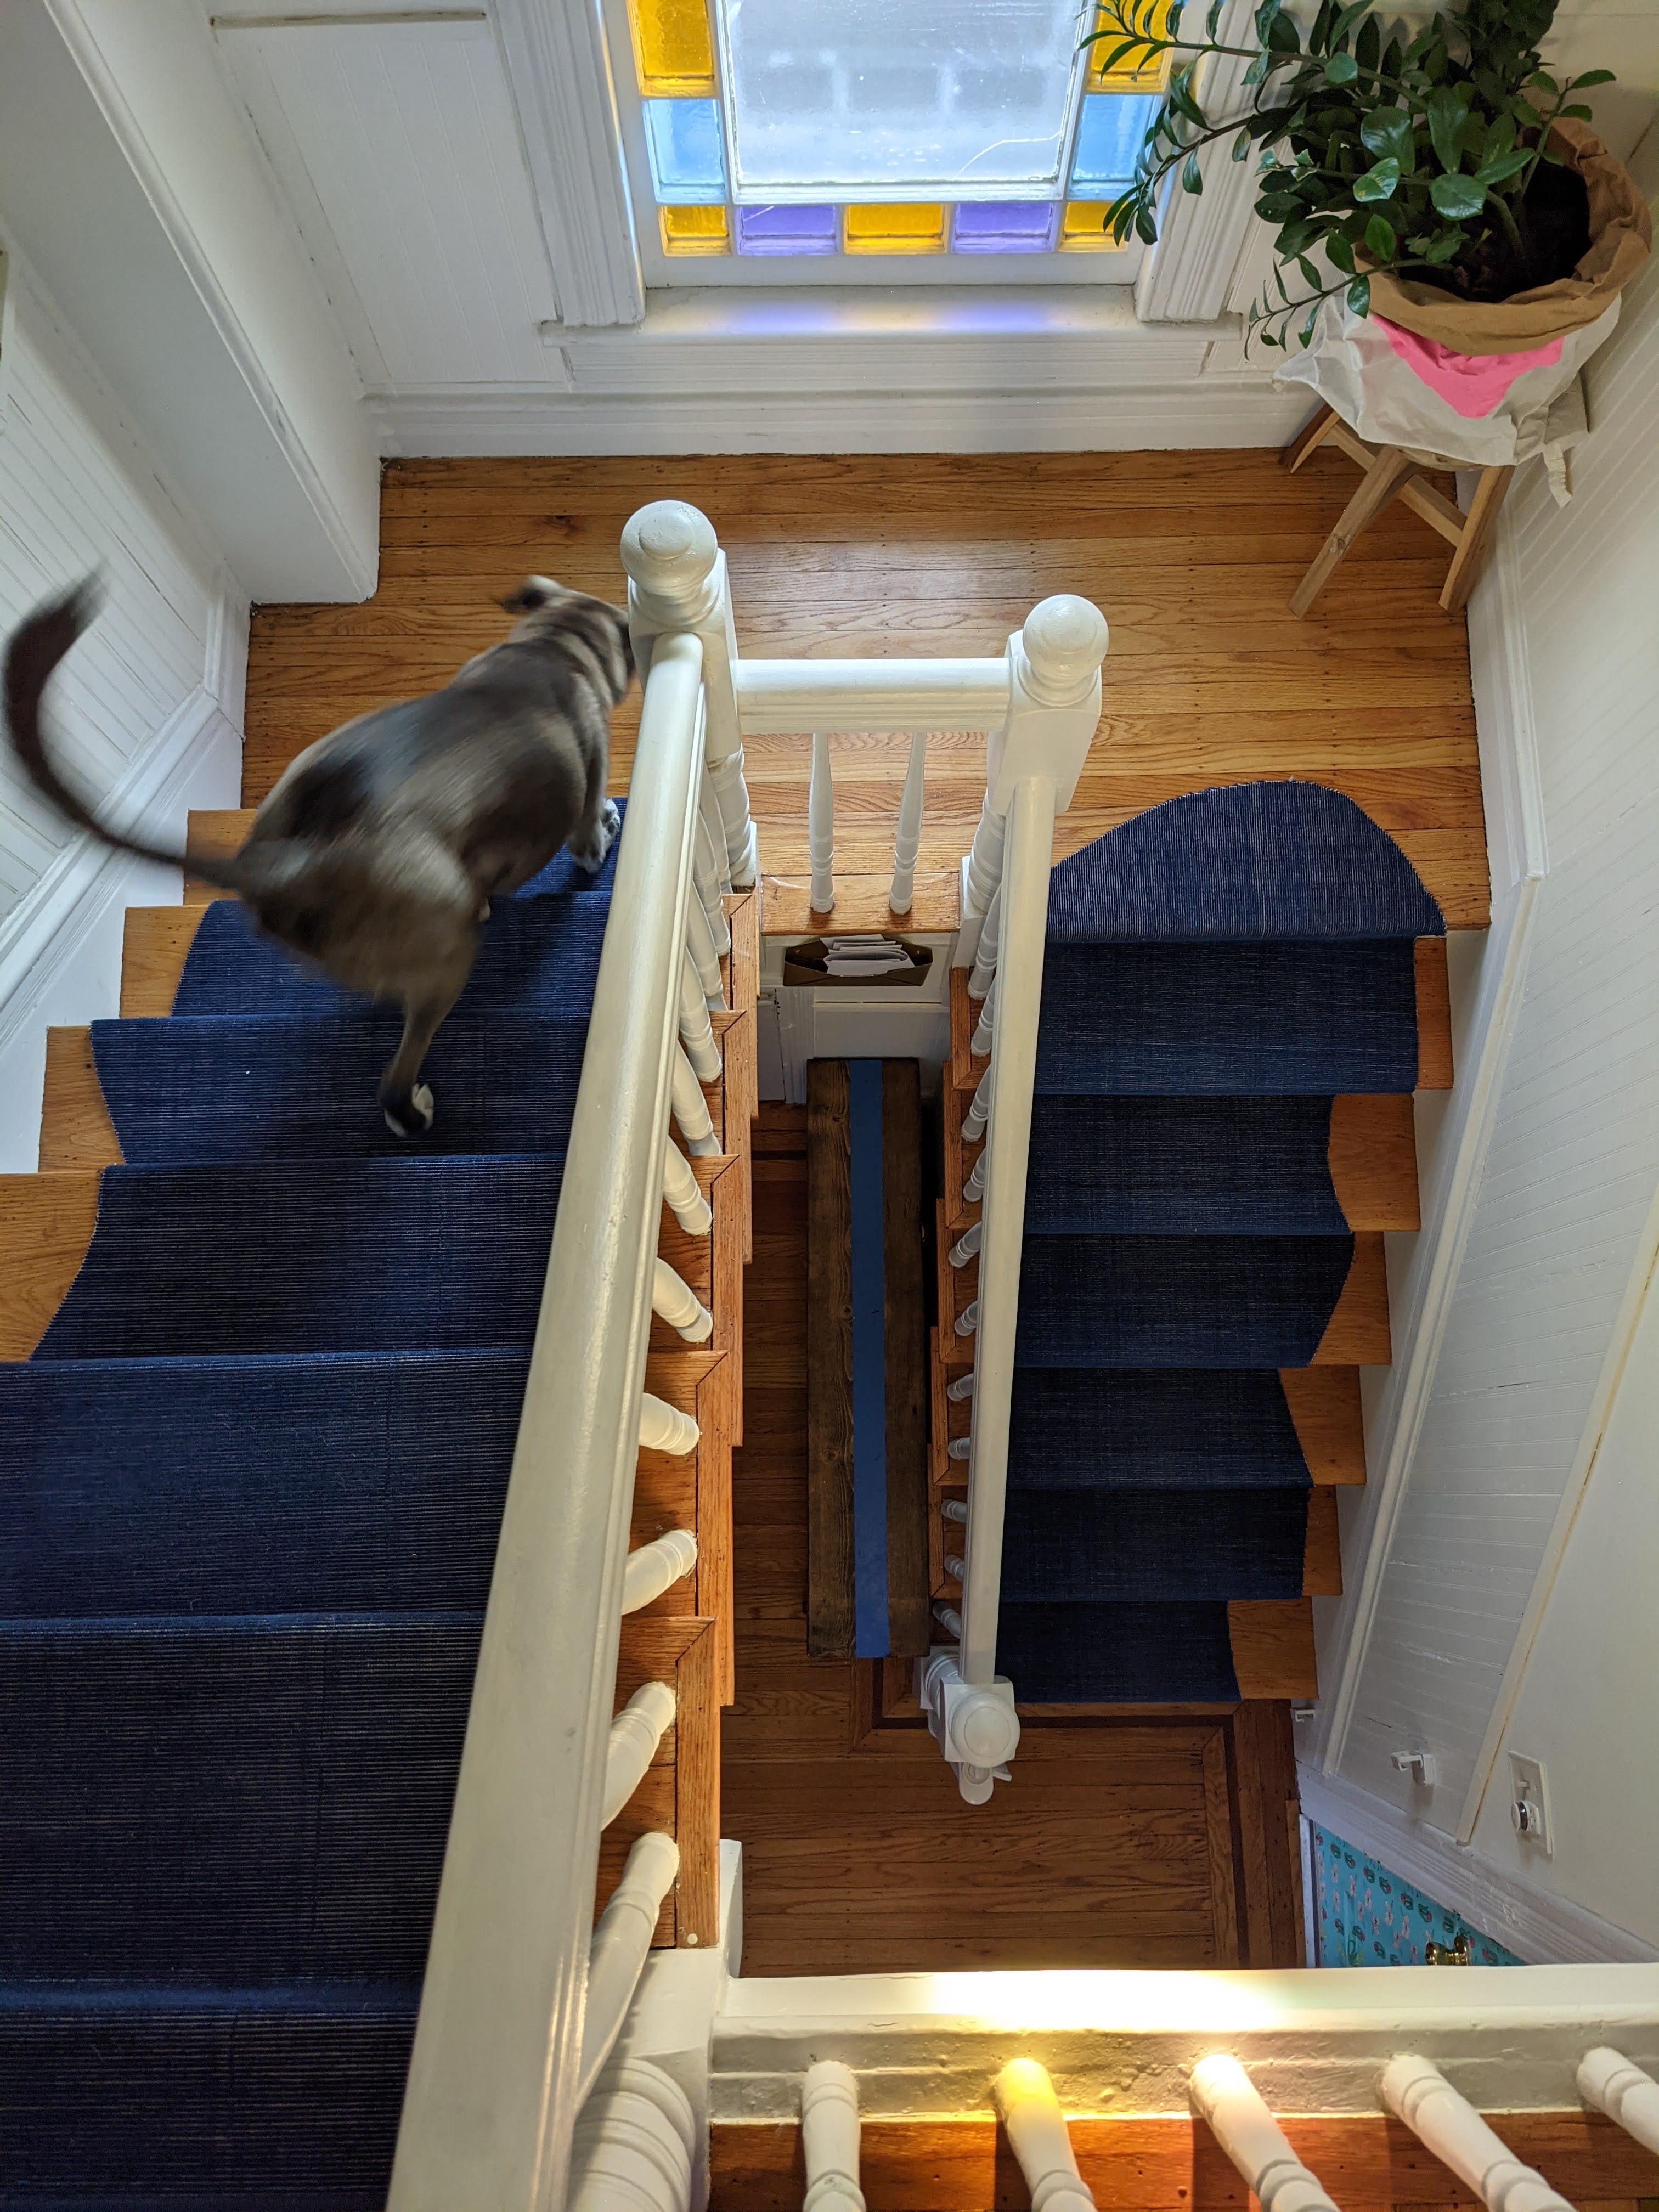
I didn’t want to spend as much time on this DIY as I had on the previous stair runner, so I lazily cut a curve pattern on both rugs, essentially slimming down the rug so it fit better on our stairs. And then we used the same installation process as I outlined here. You can see the process in my Stair Runner Highlights on Instagram.
It was all pretty easy except for two issues: 1. I wish I had cut a tighter curve on it so the scalloping detail was more obvious. 2. The rug actually wasn’t long enough! Doh! Daniel inspired me to create a solution to the problem: I used some of the cut off rug part and cut a new scalloped detail for the middle landing, and then stapled it under that top step. You can’t tell there is now an extra piece there, so problem solved.

I’m hoping that this new stair runner has fewer problems than the last one. For one, it’s a darker color so it should show wear and tear less easily. Secondly, it’s not a flat weave rug, so it shouldn’t start coming apart where I cut it, at least not as easily as the previous rug.
And another little project done!


