New Home Office DIY Bookshelf and Desk
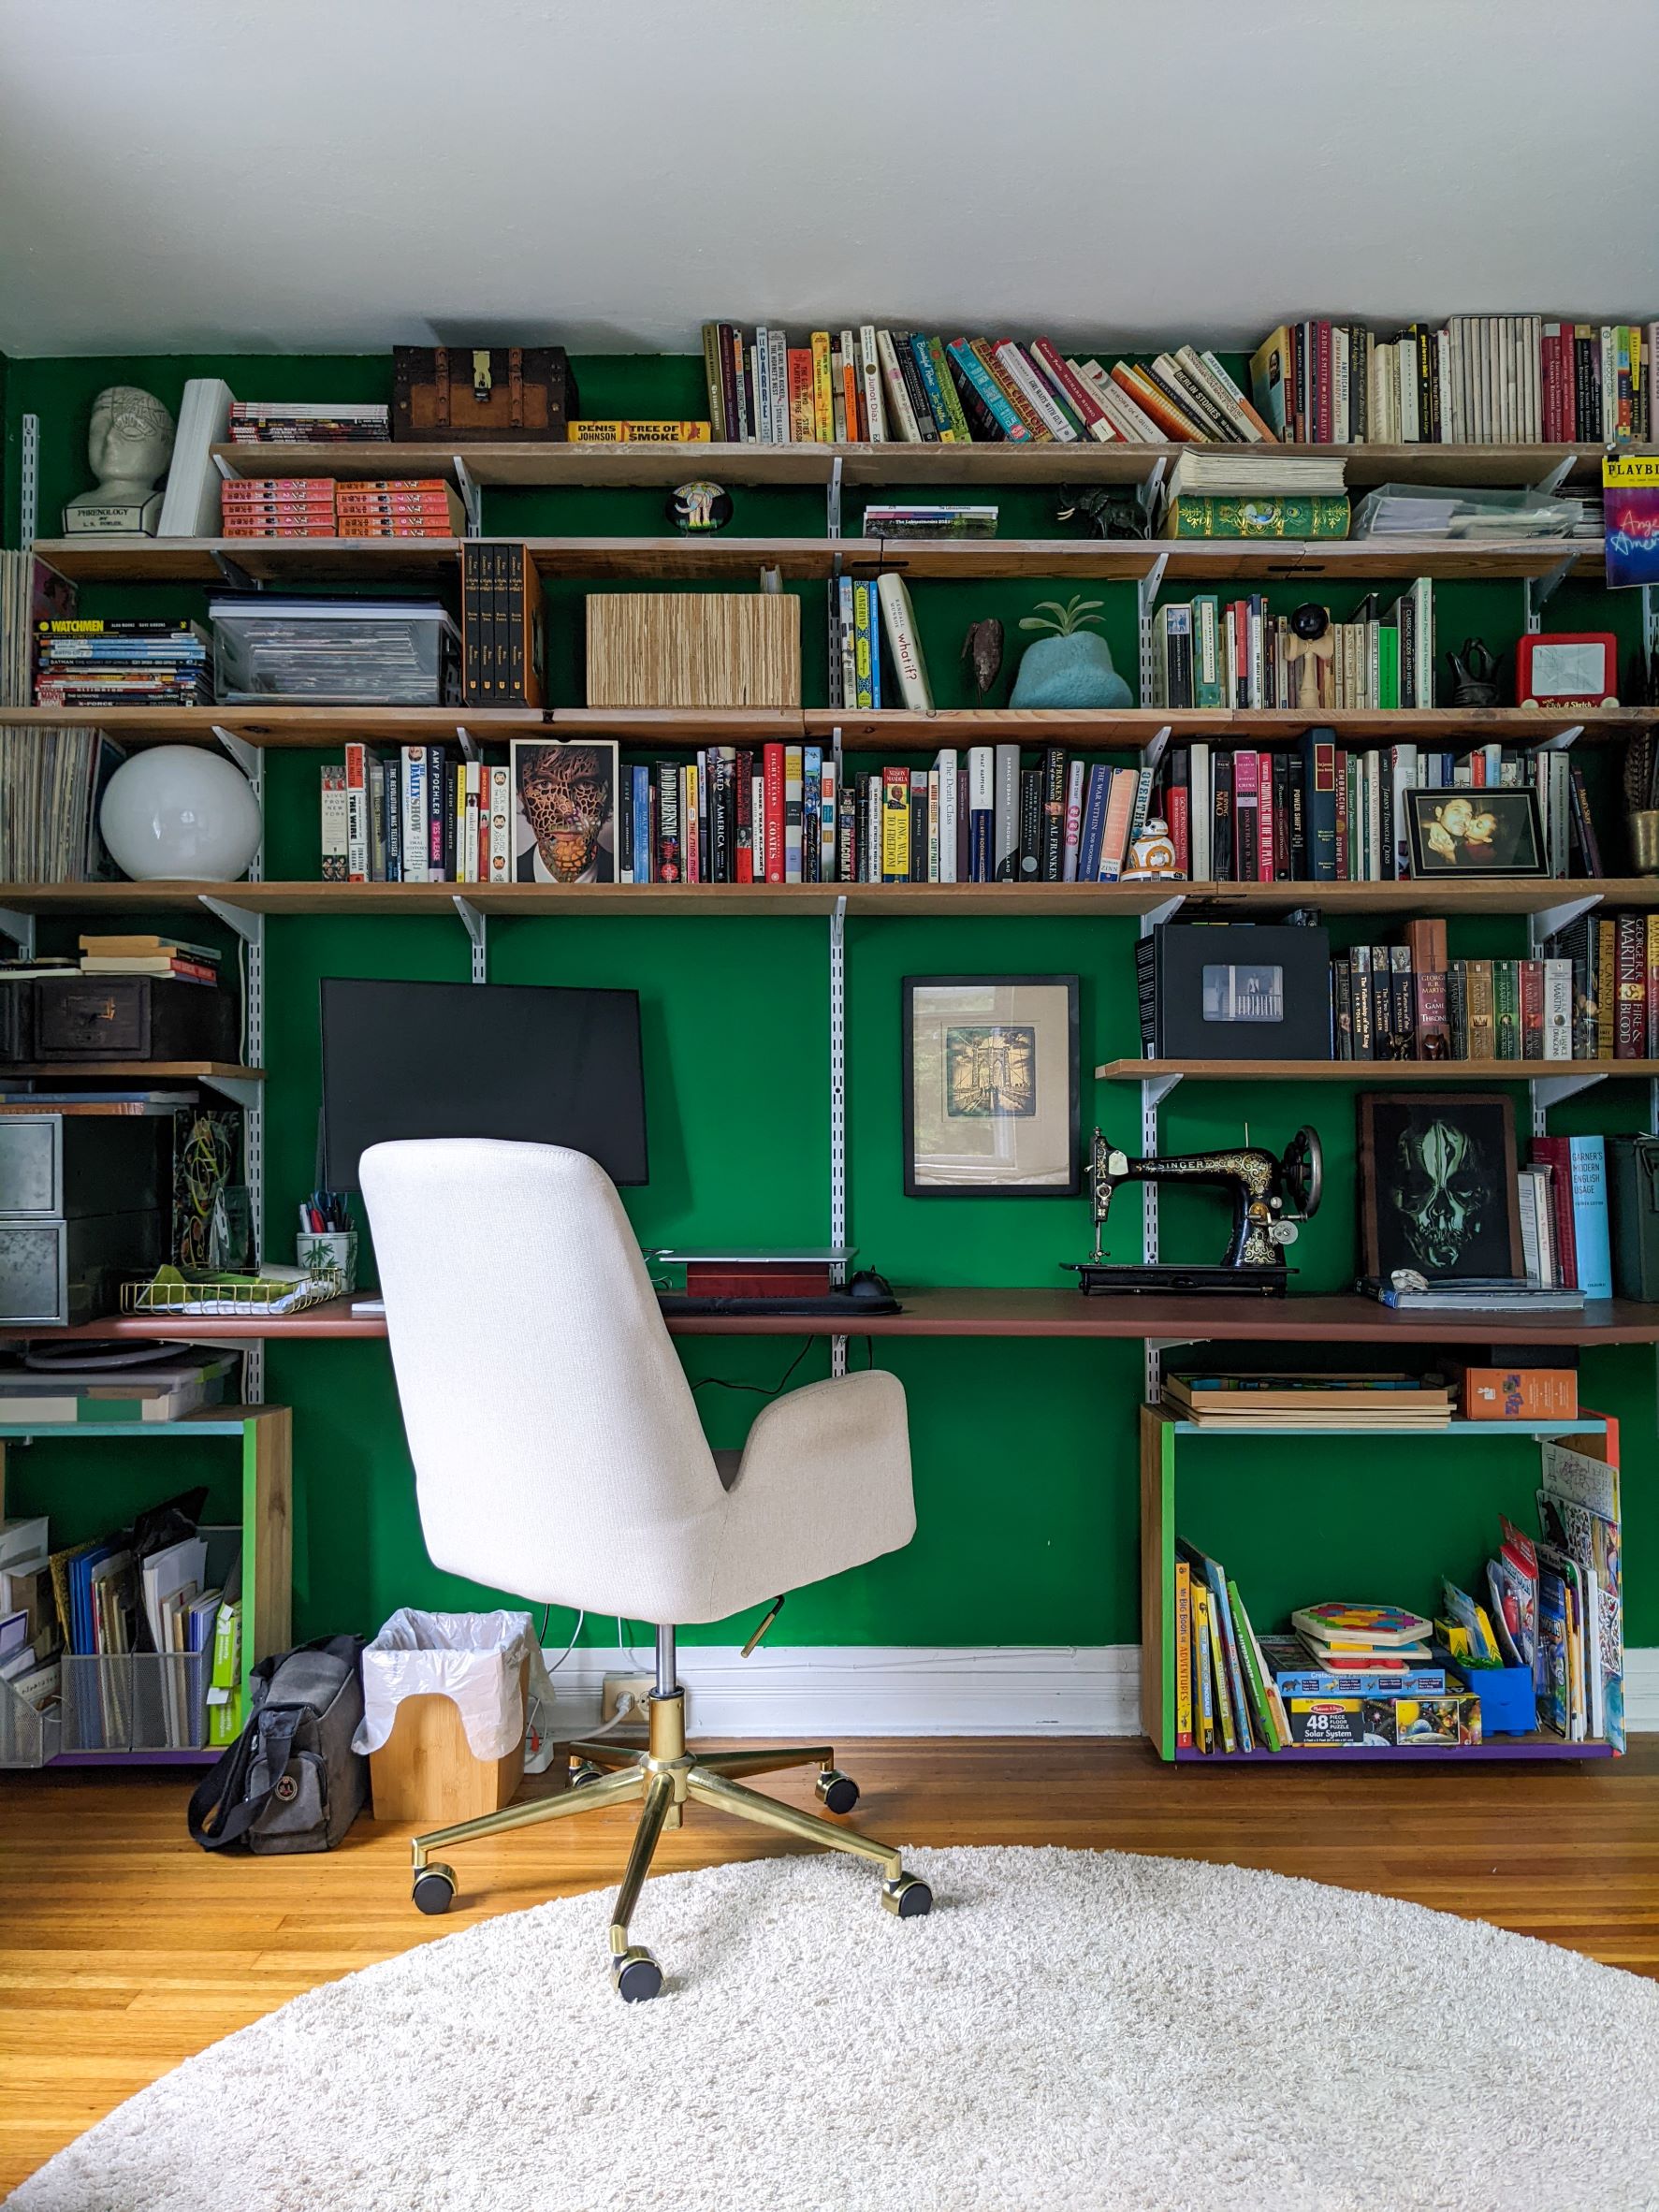
For years and years, I have been talking about creating a full wall bookshelf/desk situation for our flex guest room/library/home office and I finally did it! This DIY bookshelf and desk project includes almost entirely materials I already had as well as a new faux-leather-wrapped desk. Here’s the full scoop.
You can see here how I described wanting to do this DIY bookshelf and desk project back in January and click through links to read more about the history of this project. After completed a simple shelving project for August’s new big kid room earlier this year (see here), I realized how I could pull off this full wall system for the office. Due to several reasons, like my father giving me extra wood (read more about that here) and leftover materials from previous renovations, I decided I wanted to try making a full wall shelving unit and desk using as much pre-existing materials as I could. So here’s how the project went.
Checking for Studs
One of the most frequent annoyances we’ve had with such an old house and plaster walls is that it’s never easy or simple to screw or nail anything into any wall here, especially because it’s hard to find studs in plaster walls. The best way is to use something magnetic that will find the metal nails in the studs. I borrowed a stud finder specially made for plaster walls as it uses a magnet to help find studs. Even still, the pull of the magnet wasn’t particularly strong so I still doubted myself when using it. But I think I found six studs across the entire wall.
I screwed in seven twin track uprights (see here), one into each stud and one extra for additional support but used Molly bolts and other metal anchors in order to make sure they were really securely fastened into the wall. I would have preferred twin track uprights that ran the full height of the wall, but couldn’t find any so I thought of another solution for the lower part of the wall (more on that later).

Making the Faux Leather Desk
Then I made the desk. We had a very large and heavy piece of particleboard leftover from our kitchen renovation, so I cut it down to the right width and joined two pieces together so the desk fit perfectly across the full wall.
I bought faux leather in a cognac color and wrapped the particleboard with fabric glue and a staple gun. Once it was all finished, I bought large twin track brackets to really support the width and weight of the desk and screwed it all in.
One mistake I made here was joining two pieces of particleboard with pocket hole joints. That type of joinery doesn’t work in this scenario and I should have used flat brackets instead. Because of this, the desk looks like it’s bowing slightly on one end but because it’s supported by multiple brackets in that area, I think it will be okay.

Creating Boxes
I mentioned earlier that I didn’t find twin track uprights as long as I had wanted to reach the full height of the wall. So, that left a lot of wall space under the desk where there wouldn’t be shelves but that would just be too much wasted space.
So I built two boxes that would hang from the lowest part of the track like a shelf. The top side of the box acts as a shelf and then the bottom side of the box is another shelf. I used leftover painted wood from August’s bedroom project to create a box for his crayons and books that are hanging out in the office. Then I built a similar box on the other side of the wall for stationery and other filing items and painted the edges the same bright colors as August’s box for symmetry.

Going Vintage
Once I built this desk shelf, I got rid of our old desk. Since that desk had two drawers, I had to do something to replace that storage. I checked out a local vintage shop and scored with two old wood drawers from a former law office and two old metal drawers. All four now sit on the desk shelf and another shelf.
We also scored an old military metal container several years back that we’ve been using to hold all tech stuff that we don’t use every day, like back-up chargers and other cords.
Finishing up the Shelves
The DIY bookshelf and desk project now just needed the actual bookshelves! I cut down to size and joined several pieces of wood and particleboard together end to end using flat brackets to build shelves that would fit as much across the entire width of the wall as possible. Once the pieces were cut and joined together, I used leftover wood stain to lighten the wood up a bit and help the particleboard and wood blend in together a little more.
Then I hung the shelves with brackets based on each shelf’s width.

And now, thanks to this DIY bookshelf and desk project, we have a new home office! The room feels a little more spacious and overall looks more cohesive since it’s not just a hodgepodge of old Ikea shelves and a desk.
What do you think?


